
Customizing your skateboard is more than just a fun project—it’s a way to express your unique style and personality. Whether you’re a seasoned skater or new to the game, crafting custom skateboard graphics can transform your board into a one-of-a-kind ride. From bold designs to subtle tweaks, the possibilities are endless, allowing you to create a skateboard that truly reflects who you are. In this guide, we’ll walk you through everything you need to know, from selecting the right materials to designing eye-catching graphics, ensuring your skateboarding experience is as unforgettable as your customized ride.
Key Takeaways
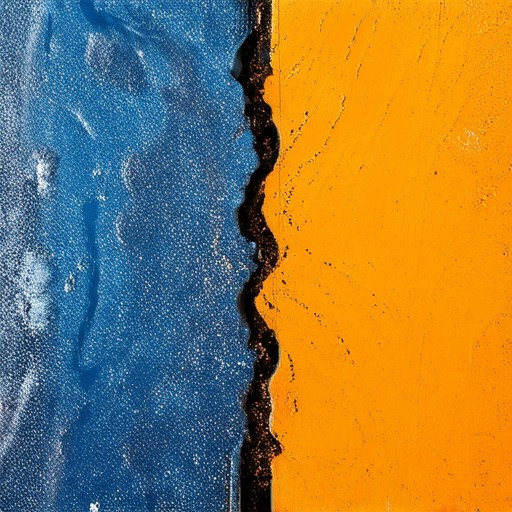
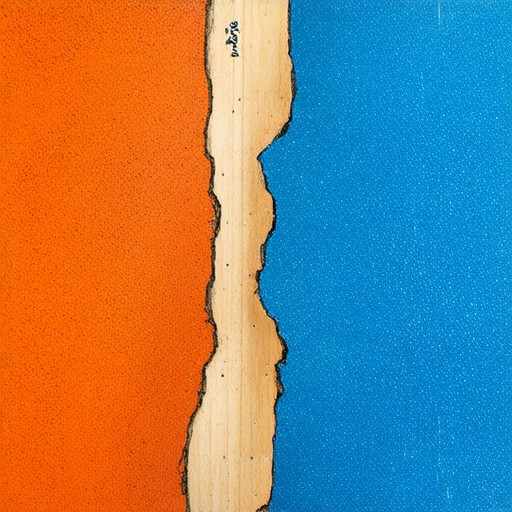
– Best Paint Options for Skateboards: Acrylic paint, oil-based paints, water-based paints, urethane coatings, and epoxy resin are top choices for creating vibrant and durable skateboard graphics.
– Essential Tools and Materials: Use spray paint, brush-on paint, stickers, paintbrushes, glass bottles, and clear sealants.
– Preparation Steps: Clean, sand, and remove old graphics before painting to ensure a smooth finish.
– Design Selection Tips: Choose designs that match your style and fit your skateboard’s size, incorporating skateboarding subcultures and key details.
– Application Techniques: Apply paint steadily and let it dry completely before adding details or using stickers.
– Protection and Longevity: Seal your design with a clear lacquer to prevent fading and scratching.
– Creative Enhancements: Experiment with colors, textures, and personal touches like names or skate spots.
– Further Learning Resources: Explore tutorials on platforms like Kickflip Boards and check out competitor sites for inspiration.
How to Put a Custom Graphic on a Skateboard
To customize your skateboard with a unique graphic, follow these organized steps:
- Prepare the Deck :
- Remove the existing grip tape carefully using a solvent to soften it, avoiding damage to the board.
- Clean the deck with a mild soap and water mixture to eliminate dirt and grime.
- Remove the Original Graphic :
- Once the grip tape is off, carefully remove the existing graphic using a solvent or gentle sanding to prevent scratching.
- Apply Transfer Paper :
- Print your custom design onto high-quality transfer paper.
- Position the transfer paper over the prepared deck and use an iron to burn the image, ensuring it adheres without bubbles or smudges. Practice on scrap material first for better results.
- Set the Design :
- Allow the transferred image to set for 15-30 minutes.
- Remove the transfer paper gently to reveal your design.
- Seal the Graphic :
- Apply a food-safe sealant or clear coat using a brush to protect the design. Follow the product instructions to avoid harming the board’s finish.
- Consider Design Type and Protection :
- Choose between decals, full wraps, or smaller designs, adjusting application methods accordingly.
- Protect vulnerable areas with protective film or tape to prevent wear and tear.
- Reapply Grip Tape :
- After designing, reattach grip tape evenly for optimal control, ensuring no air bubbles.
- Tools and Safety :
- Essential tools include a solvent, transfer paper, printer, iron, and utility knife.
- Work in a well-ventilated area and handle the board gently to avoid damage.
By following these steps, you can confidently customize your skateboard, combining personal style with functionality.
Can You Customize Your Own Skateboard?
Yes, you can definitely customize your own skateboard! Whether you’re looking to personalize it with unique graphics, upgrade components, or create a completely original design, there are plenty of ways to make your board truly yours. Here’s how you can get started:
- Design Your Deck:** Many skateboard manufacturers offer custom deck designs through their websites. Companies like Kickflip Boards allow you to choose from a variety of shapes, colors, and graphic options to create a deck that matches your style.
- Select Components:** Customize the wheels, trucks, and bearings to suit your preferred riding style. Brands like Bones Bearings and Independent Trucks offer a range of options to enhance your board’s performance and aesthetics.
- Local Skate Shops:** Visit local skate shops or online platforms like Skate Warehouse to explore ready-to-assemble kits or DIY customization sets. These shops often carry everything you need to build a customized skateboard from scratch.
- Custom Shapes and Finishes:** Some skateboard companies specialize in custom orders, allowing you to specify the exact shape, size, and finish of your board. Look into options from Amazon or specialty skate shops for unique designs.
To get started, consider the following tools and materials:
- Sanding tools for smoothing rough edges
- Paint or spray paint for custom colors
- Graphic design software (optional)
- Epoxy resin for repairing cracks or adding grip tape
Remember to take safety precautions when customizing your skateboard. Always wear gloves and eye protection, and ensure all tools are grounded properly. With a bit of creativity and effort, you can transform a standard skateboard into something truly unique!
Can You Change Skateboard Design?
Yes, you can definitely change skateboard design to personalize your board according to your style and preferences. Customizing a skateboard allows you to express yourself and make it unique. Here’s how you can go about it:
1. Paint or Refinish the Deck
One of the most common ways to customize a skateboard is by painting or refinishing the deck. You can choose from a variety of colors and designs to match your personality. Whether you prefer a solid color or a vibrant design, you can find inspiration online or create your own artwork. Use high-quality spray paint or specialized skateboard paint for the best results. Once dried, you can add graphics or decals to complement your design.
2. Customize the Wheels
Skateboard wheels come in various sizes, shapes, and colors. You can replace the original wheels with ones that match your board’s design. Different wheel sizes affect the board’s stability and maneuverability, so choose wisely based on your riding style. Popular options include 53mm and 55mm wheels, with sizes ranging from 51mm to 60mm. You can also find colorful wheels to add a pop of color to your setup.
3. Add Grip Tape
Grip tape is essential for control, but you can also use it as a canvas for customization. Many riders opt for colored grip tape to match their board’s theme. You can find textured grip tape in various patterns and colors, allowing you to create a unique look while maintaining traction. For a more DIY approach, you can even create your own grip tape using materials like sandpaper or grip strips.
4. Personalize the Hardware
Skateboard trucks and bushings are often overlooked, but they play a crucial role in the board’s performance. You can upgrade to higher-quality trucks or bushings for better stability and responsiveness. Additionally, you can customize the hardware with colored risers, bolts, and nuts to match your board’s aesthetic. Just ensure the hardware is secure and functional after installation.
5. Add Decals and Stickers
Decals and stickers are a quick and easy way to personalize your skateboard. You can find a wide range of designs, from motivational quotes to fun illustrations. These can be applied to the deck, wheels, or grip tape for a personalized touch. Just make sure they are weather-resistant and won’t peel off easily.
6. Replace Components
If you’re looking for a more drastic transformation, you can replace certain components of your skateboard. This includes changing the deck shape, wheels, or even the truck setup. Experiment with different combinations to find the setup that suits your riding style best. You can also add custom bearings or axles for improved performance.
7. Maintenance Tips
After customizing your skateboard, it’s important to take care of it. Avoid using harsh chemicals or solvents, as they can damage the paint or materials. Regularly inspect the board for loose hardware or wear and tear. A well-maintained skateboard will last longer and retain its custom design.
Kickflip Boards offers a variety of resources and guides to help you customize your skateboard. Check out our custom skateboard guide for more tips and tricks. With a bit of creativity and effort, you can transform your skateboard into something truly unique!
Types of Paint for Skateboards
When choosing paint for your skateboard, consider the following options:
- Acrylic Paint: Acrylic paint is a popular choice due to its fast drying time and versatility. It works well on various surfaces and can be applied with a brush or roller for larger areas and markers for detailed designs. Ensure to let the paint dry completely between layers to avoid smudging.
- Oil-Based Paint: Oil-based paints are known for their durability and rich color pigmentation. They may be a good option for achieving a professional finish, though they can take longer to dry and require proper ventilation.
- Water-Based Paint: Water-based paints, such as latex or acrylic, are easy to clean and have minimal odor. They dry quickly and are ideal for detailed work, making them a good choice for intricate designs.
- Urethane and Polyurethane Coatings: These coatings offer excellent protection and a smooth finish. They are long-lasting but may require more time to cure, depending on the specific product used.
- Epoxy Resin: Epoxy resin provides a durable and glossy finish. It is heavy, so ensure the skateboard’s balance isn’t affected before applying it.
Consider the surface of your skateboard and the finish you desire. Many brands specialize in skateboard-specific paints, offering custom colors and effects like metallics or glow-in-the-dark finishes. Always prepare the surface by sanding it lightly before painting and allow adequate drying time between coats for optimal adhesion and durability.
How to Customize Skateboard Graphics
Customizing skateboard graphics is a fun and creative process that allows you to personalize your board. Here’s a step-by-step guide to help you get started:
Tools and Materials Needed
- Spray paint or brush-on paint
- Stickers or decals
- Paintbrushes or sponges
- Glass bottles or jars for mixing paints
- Clear sealant or lacquer (optional)
Step 1: Prepare Your Board
- Clean the surface of your skateboard to remove dirt, oil, and grime.
- Lightly sand the area you’ll be painting to ensure smooth coverage.
- Remove any existing graphics or stickers before applying new ones.
Step 2: Choose Your Design
- Pick a design that matches your personal style or skateboarding lifestyle.
- Consider the size and layout of your skateboard to ensure the design fits well.
- Look for inspiration online or in skateboarding communities for ideas.
Step 3: Apply Paint or Stickers
- For paint-based designs, use a steady hand to apply the paint evenly.
- Let the paint dry completely before adding details or additional layers.
- Add stickers or decals for a more vibrant and dynamic look.
Step 4: Protect Your Design
- Apply a clear sealant or lacquer to protect the graphics from fading or scratching.
- Store your skateboard in a safe place to maintain its customized look.
Additional Tips
- Experiment with different colors and textures to create a unique finish.
- Consider adding personal touches, such as your name or favorite skate spots.
- Check out tutorials and guides on platforms like Kickflip Boards for more tips and tricks.
By following these steps, you can transform your skateboard into a personalized masterpiece that reflects your individuality and style. Whether you prefer bold paintings or intricate sticker collections, the possibilities are endless!
Creating Unique Skateboard Graphics Designs
Kickflip Boards offers a comprehensive guide to crafting distinctive skateboard graphics that capture the essence of skateboarding culture. Below are expert tips and techniques to help you create unique designs:
- Choose Your Tools : Utilize professional graphic design software like Adobe Photoshop or explore user-friendly platforms such as Canva. For cost-effective solutions, consider free online tools available in the market.
- Select Bold Colors and Edgy Fonts : Opt for vibrant, eye-catching colors paired with fonts that exude attitude, reflecting the rebellious spirit of skateboarding. Dark and neon hues, along with grunge-style fonts, are popular choices.
- Define Your Theme : Combine elements from skateboarding subcultures, such as cityscapes, iconic skaters, or urban street art, to create a cohesive theme that resonates with the skateboarding lifestyle.
- Incorporate Key Details : Integrate elements like skate wheels, grip tape textures, or action figures. Focus on a few standout details to maintain clarity and avoid visual clutter.
- Add Personal Touches : Personalize your design with your name or a meaningful message. Incorporate skateboarding slang or symbols to make it relatable and authentic to the community.
- Research Application Methods : Explore printing, transferring, and wrapping techniques to effectively apply your design onto a skateboard, ensuring durability and visual appeal.
- Experiment with Effects : Add gradients or distressing effects for an authentic skateboarding aesthetic, balancing creativity with subtlety to avoid overwhelming the design.
For more insights into skateboard design trends and techniques, visit Kickflip Boards . Explore articles on skateboarding techniques, gear recommendations, and cultural trends to enhance your creative process.
Competitors like Alien Workshop , Element , and Girl Skateboarding also offer valuable resources for designing unique skateboard graphics. Check out their websites for additional inspiration and techniques.
By following these steps, you can create skateboard graphics that not only stand out but also resonate deeply with the skateboarding community. Happy designing!


0 Comments