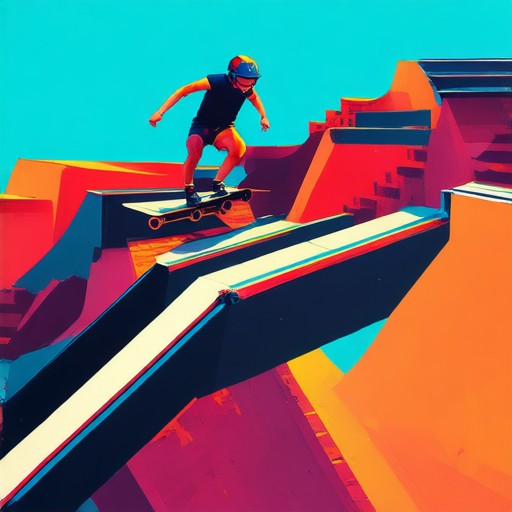
Mastering skateboarding requires consistent practice, and finding the right tools to enhance your skills is crucial. Skateboarding ramps, often referred to as halfpipes or quarter pipes, offer a controlled environment for honing tricks and improving your technique. Whether you’re a seasoned skater or just starting out, understanding the types of ramps, materials, and costs involved can help you create the perfect setup for practice. In this definitive guide, we’ll explore everything you need to know about skateboarding ramps, from choosing the right materials to budgeting for your project. We’ll also delve into the differences between quarter pipes and halfpipes, helping you decide which setup aligns best with your skill level and goals. With the right ramp setup, your practice sessions can become more effective and enjoyable, taking your game to the next level.
Key Takeaways
- Building a Halfpipe Costs Range from $100 to Over $1,000 Depending on Materials, Size, and Complexity.
- Factors like materials (wood, metal, or plastic), size (basic or extended), and customization (grinding ledges or lighting) influence the total cost.
- DIY Halfpipe Builds Can Save Money but Require Planning and Tools, While Professional Installation Adds Labor Costs.
- Homeowners can save on costs by building themselves, though this involves sourcing materials and tools. Hiring contractors increases expenses by $200 to $600 for labor.
- Larger Halfpipes Are Pricier and Offer More Stability, Making Them Ideal for Skaters Seeking a Challenge.
- Bigger halfpipes, costing up to $1,000 or more, provide greater stability and a larger space for tricks, catering to advanced riders.
- Quarter Pipes Are Portable and Budget-Friendly, Perfect for Beginners, While Halfpipes Provide a Larger Space for Advanced Tricks.
- Quarter pipes, costing between $100 and $300, are lightweight and portable, ideal for temporary setups and learning basics. Halfpipes, however, are heavier and better suited for skilled riders seeking more challenging features.
- Ramp Costs Vary Widely Based on Type: Residential Ramps Are Affordable, Prefabricated Models Are Mid-Range, and Custom Designs Can Be Expensive.
- Choices range from affordable DIY kits ($100-$800) to professionally installed models costing up to $5,000, influenced by factors like material quality and permanence.
- Factors Like Location, Material Quality, and Permanent Status Significantly Influence Ramp Construction Costs.
- Costs are affected by location, material choice (treated lumber vs. pressure-treated wood), regulatory requirements, and whether the ramp is temporary or permanent.

What Are Skateboarding Ramps Called?
Skateboarding ramps are commonly referred to as launch ramps , kickers , pyramids , and fun boxes . These structures are designed to assist skateboarders in performing various tricks and jumps. Launch ramps typically have a sloped surface leading up to a flat landing area, while kickers are curved or angled surfaces that send skateboarders into the air. Pyramids and fun boxes are also popular designs, offering different configurations for trick execution.
Skateboarding ramps are essential tools for practicing and advancing tricks, and they come in various shapes and sizes depending on the specific skill being targeted. They are widely used in skateparks and backyard setups alike, providing a stable surface for riders to land after jumps and flips.
Are Keen Ramps Worth It?
Keen Ramps are a valuable investment for skateboarders seeking a dedicated space to practice tricks. Their sturdiness and reliability make them a worthwhile addition to any setup, offering a safe and consistent surface for maneuvers like kickflips and grinds.
- Durability: Built with high-quality materials, Keen Ramps stand up to frequent use, minimizing safety hazards and extending their lifespan.
- Portability: Depending on the model, some ramps can be easily moved, accommodating various setups or storage needs.
- Cost Considerations: While pricing varies, the investment is justified for regular users, potentially saving wear on public ramps and enhancing practice efficiency.
- Design and Size: Available in diverse sizes, Keen Ramps cater to different skill levels and board sizes, ensuring a fit for various needs.
- Installation and Safety: Easy to assemble and designed with non-slip surfaces, Keen Ramps prioritize both usability and safety.
- Warranty and Support: Backed by solid durability and supported by potential community networks, Keen Ramps offer peace of mind and assistance when needed.
Ultimately, Keen Ramps are recommended for serious skateboarders looking to elevate their practice sessions in a controlled, safe environment. Their benefits in durability, safety, and convenience make them a worthwhile investment, though personal needs and budget should guide the decision.

The Best Material for a Skateboard Ramp
When constructing a skateboard ramp, selecting the right material is crucial for durability, safety, and performance. Here’s an overview of the most commonly used materials and their benefits:
1. Concrete
Concrete is one of the most popular materials for skateboard ramps due to its strength and longevity. It provides a solid foundation and can withstand heavy use, making it ideal for professional setups. However, it requires proper treatment to prevent cracks and wear.
2. Epoxy Resin
Epoxy resin is another excellent choice for skateboard ramps. It offers a smooth surface and exceptional durability, making it perfect for high-traffic areas. Its resistance to wear and tear makes it a great long-term investment for any skatepark.
3. Polyurethane
Polyurethane is known for its flexibility and ability to withstand impact. It’s often used for ramps that require a forgiving surface, ensuring skaters can land safely without risking injury. Its lightweight nature also makes installation easier.
4. Wood
While less common, wood can be a viable option for smaller, temporary ramps. It’s easy to shape and can provide a more traditional feel. However, it may not be as durable as other materials, especially in harsh weather conditions.
5. Fiberglass
Fiberglass is a great material for ramps that need a smooth surface and excellent grip. It’s lightweight yet strong, making it a good choice for portable or modular setups. Plus, it can be reinforced with epoxy resin for added durability.
6. Rubber Tiles
Rubber tiles are another option for skateboard ramps, particularly for their shock-absorbing properties. They offer a cushioned landing surface and are easy to install, though they may not be as long-lasting as other materials.
Choosing the Right Material
The best material for a skateboard ramp depends on factors like intended use, budget, and location. Skatelite® remains a top recommendation for its reliability and sustainability. For a professional setup, consider concrete or epoxy resin for their strength and durability. If portability is needed, fiberglass or polyurethane could be better suited. Always ensure the surface is safe and meets local regulations for skateparks.
For more information on building a skateboard ramp, check out our complete guide and explore our selection of ramp materials .

How Much Does It Cost to Build a Halfpipe?
The cost to build a halfpipe depends on several factors, including materials, size, and whether you’re constructing it yourself or hiring a professional.
Factors Influencing Cost
- Materials: The primary material affects the cost. Wood, metal, and plastic are common choices. Wood is often the cheapest but may require treatment, while metal is durable but more expensive. Plastic is lightweight but can be costly.
- Size: A smaller, basic halfpipe typically costs between $100 and $300. Larger or custom designs, such as mini-ramps or extended pipes, can range up to $1,000 or more.
- Customization: Additional features like grinding ledges or lighting can add $100 to $600 to the project.
- Installation: If you hire a contractor, expect to pay an extra $200 to $600 for labor, depending on complexity and location.
Cost Estimate Table
| Feature | Cost Range |
|---|---|
| Basic Halfpipe (DIY) | $100 – $300 |
| Larger Halfpipe | $500 – $1,000+ |
| Professional Installation | $200 – $600+ |
Additional Considerations
- D.I.Y. Options: Building a halfpipe yourself can save money but requires purchasing materials and tools. Check local hardware stores or online retailers for deals.
- Hiring a Professional: For complex builds or custom designs, consider hiring a contractor experienced in woodworking or metalworking.
- Permits: Some locations may require permits for building structures, so check local regulations before starting.
Conclusion
Building a halfpipe is a manageable project that offers a rewarding result. Whether you’re a seasoned DIYer or hiring help, the total cost will vary based on your preferences and project scope. Start by planning your design and gathering materials to stay on track and within budget.
Cost to Build a Ramp
The cost to build a ramp can vary significantly depending on the type of ramp, materials used, and the complexity of the project. Below is a breakdown of the primary options:
- Residential Ramps: These are typically smaller, temporary structures designed for accessibility around homes or properties. The cost usually ranges from $200 to $1,000, depending on the material (wood or concrete) and labor.
- Modular/Prefabricated Ramps: These are pre-made ramps that can be assembled on-site. Prices generally range from $300 to $2,500, depending on size and features.
- Professional Installation Services: Hiring a contractor or construction company to build a ramp can cost between $500 and $5,000+, depending on the scope and location.
- DIY Kits: Pre-cut kits for ramps are available online and can be installed by homeowners. Prices typically range from $100 to $800, depending on the kit size and quality.
Additional factors affecting cost include:
- Location and regional construction costs
- Material quality (e.g., treated lumber vs. pressure-treated wood)
- Permits and regulations required for construction
- Whether the ramp is temporary or permanent

Understanding the Difference Between Quarter Pipes and Halfpipes
A quarter pipe and a halfpipe are both essential components in skateboarding, but they serve distinct purposes and have unique characteristics. Here’s a breakdown of their differences:
- Shape and Design: – Quarter Pipe: Features a single, continuous curve resembling a quarter-circle. This design allows for maximum portability and ease of use. – Halfpipe: Boasts two sides, each forming a semi-circular arc, creating a complete half-circle shape. This design provides greater stability and a larger space for tricks.
- Size and Weight: – Quarter Pipe: Typically smaller in size, making it lightweight and easy to transport. It is commonly used for temporary setups in various locations. – Halfpipe: Larger in dimensions, requiring more structural support. It is often permanently installed in skate parks or dedicated areas due to its weight and size.
- Usage and Skill Level: – Quarter Pipe: Ideal for beginners and intermediate skaters who appreciate its portability and simplicity. It is perfect for learning tricks like kickflips and grinds. – Halfpipe: Designed for more advanced skaters who seek a challenge. It offers a longer run-up and a larger gap, accommodating more complex tricks and higher jumps.
- Material and Construction: – Both quarter pipes and halfpipes are constructed from durable materials such as wood or metal, ensuring longevity and safety for skaters.
In summary, while both quarter pipes and halfpipes are integral to skateboarding, their differing designs cater to varying needs and skill levels. Whether you’re looking for portability or a permanent setup, there’s a ramp for every rider.


0 Comments